Appearance
PseudoSites Setup
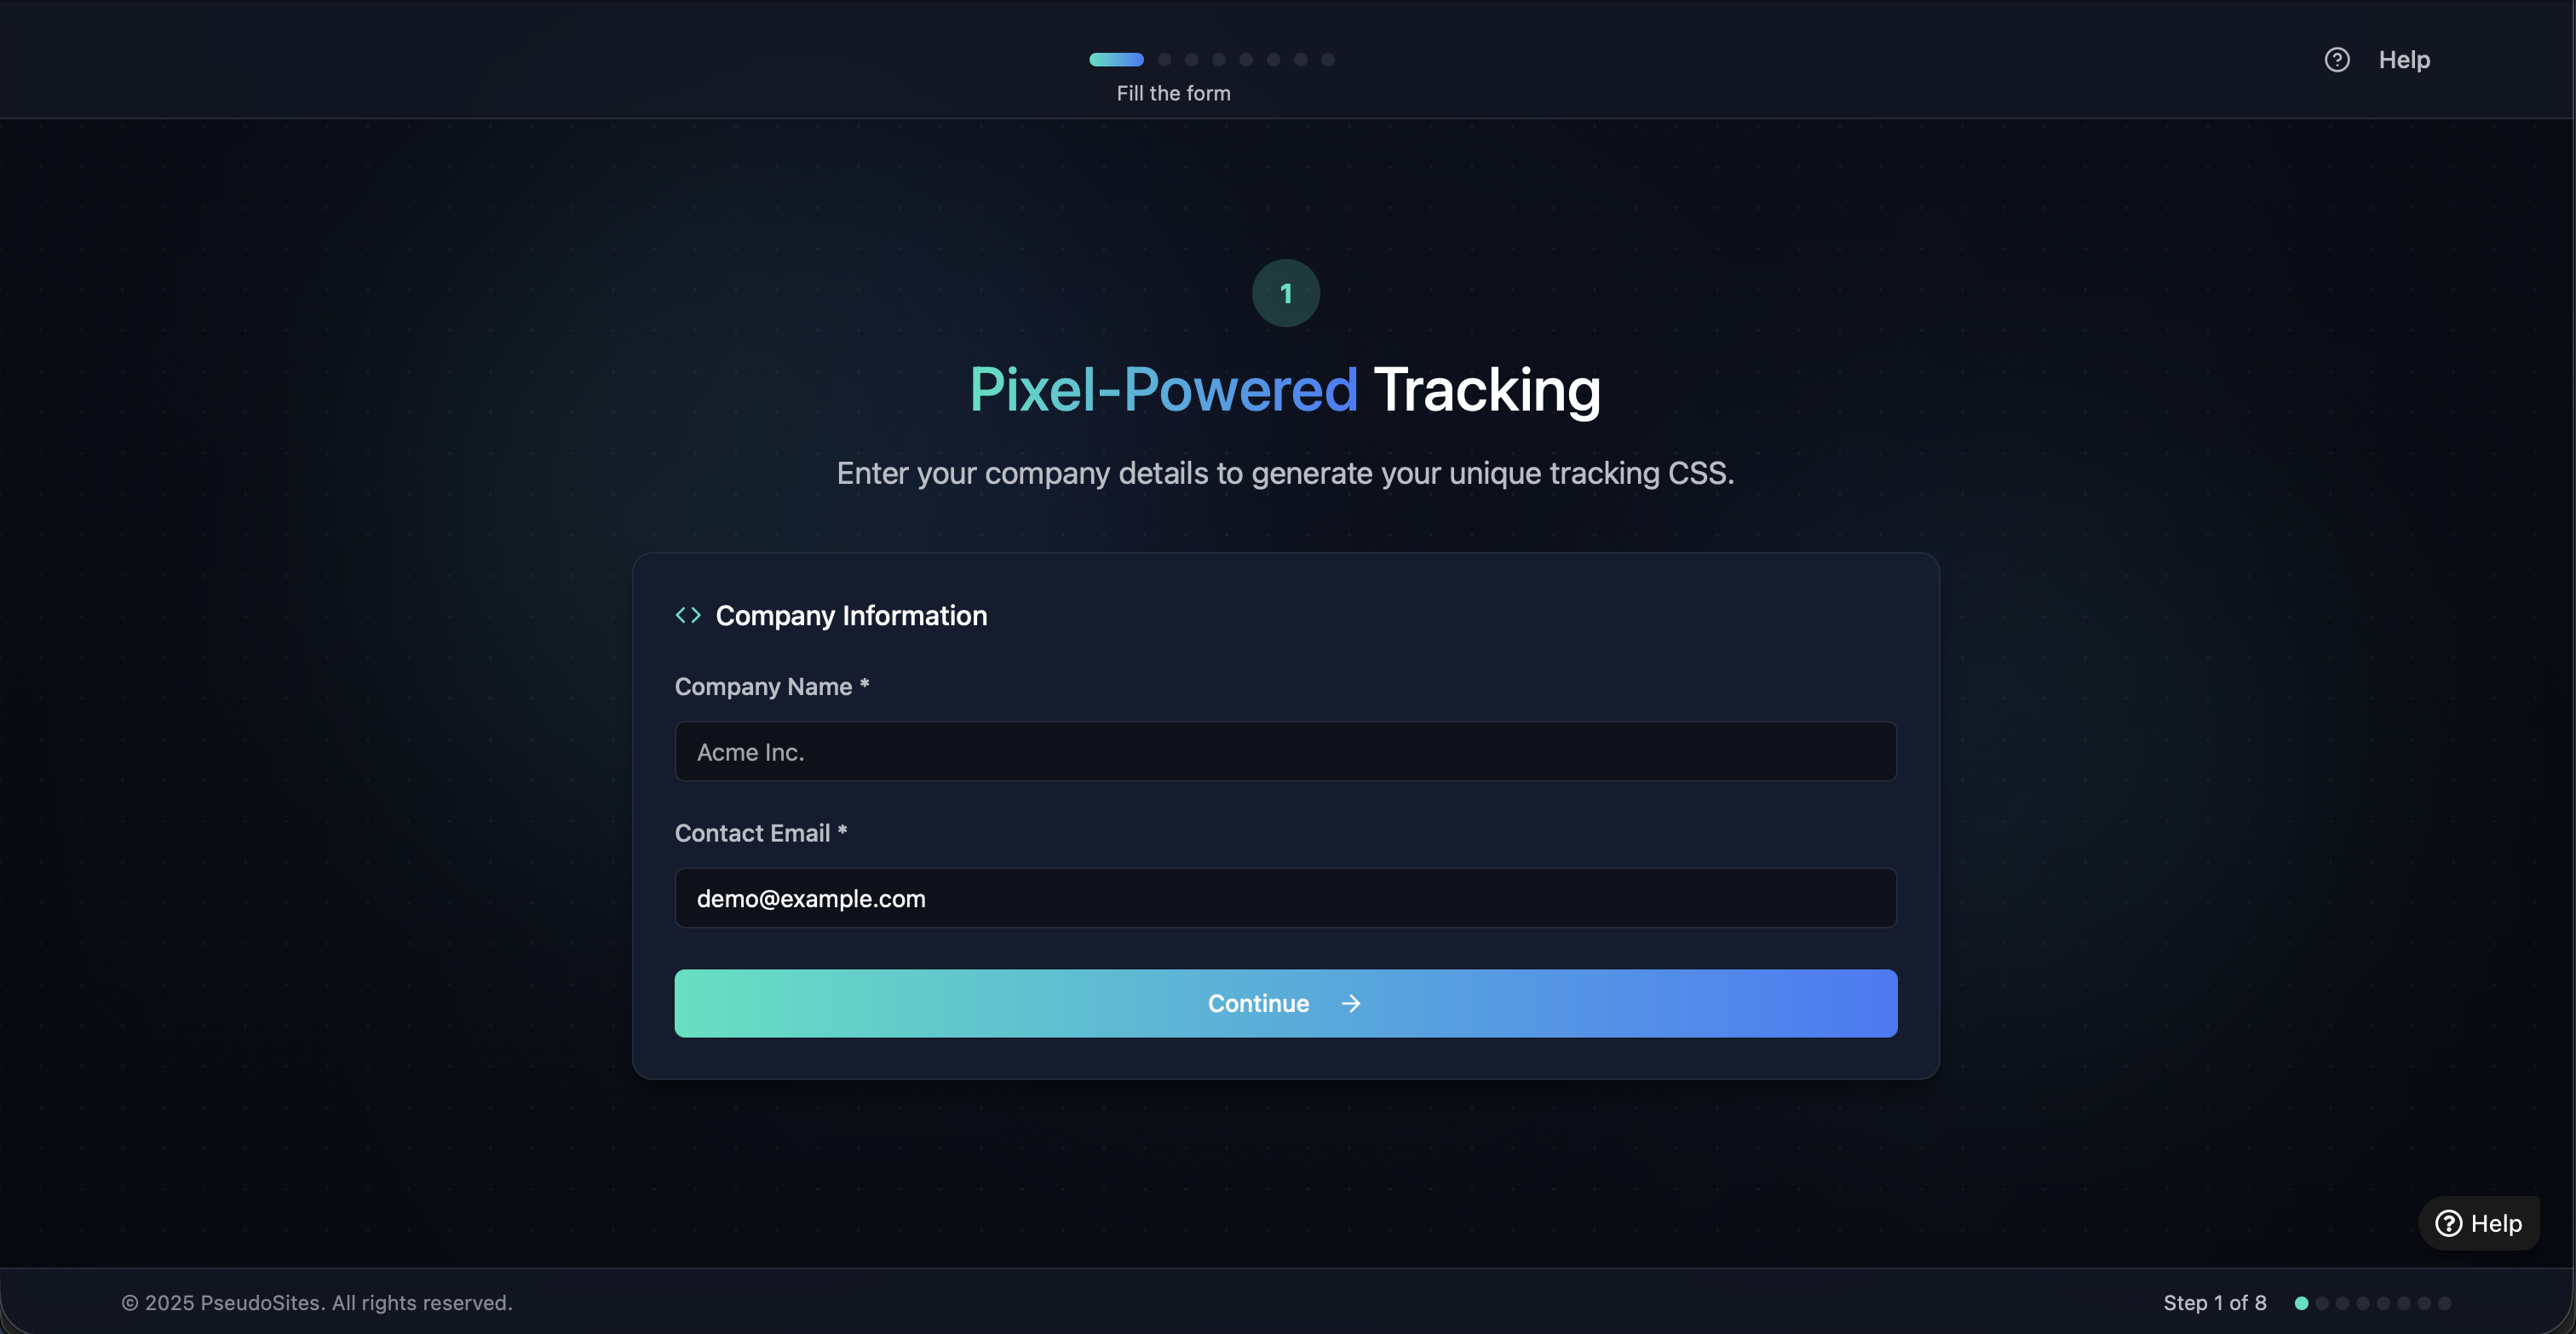
Step 1: Enter Company Information
Begin by entering your company details. These will be used to generate a unique tracking CSS identifier.
- Company Name: Enter your organization name (e.g.,
Acme Inc.) - Contact Email: Provide an admin or support email (e.g.,
demo@example.com)
Click Continue to proceed.
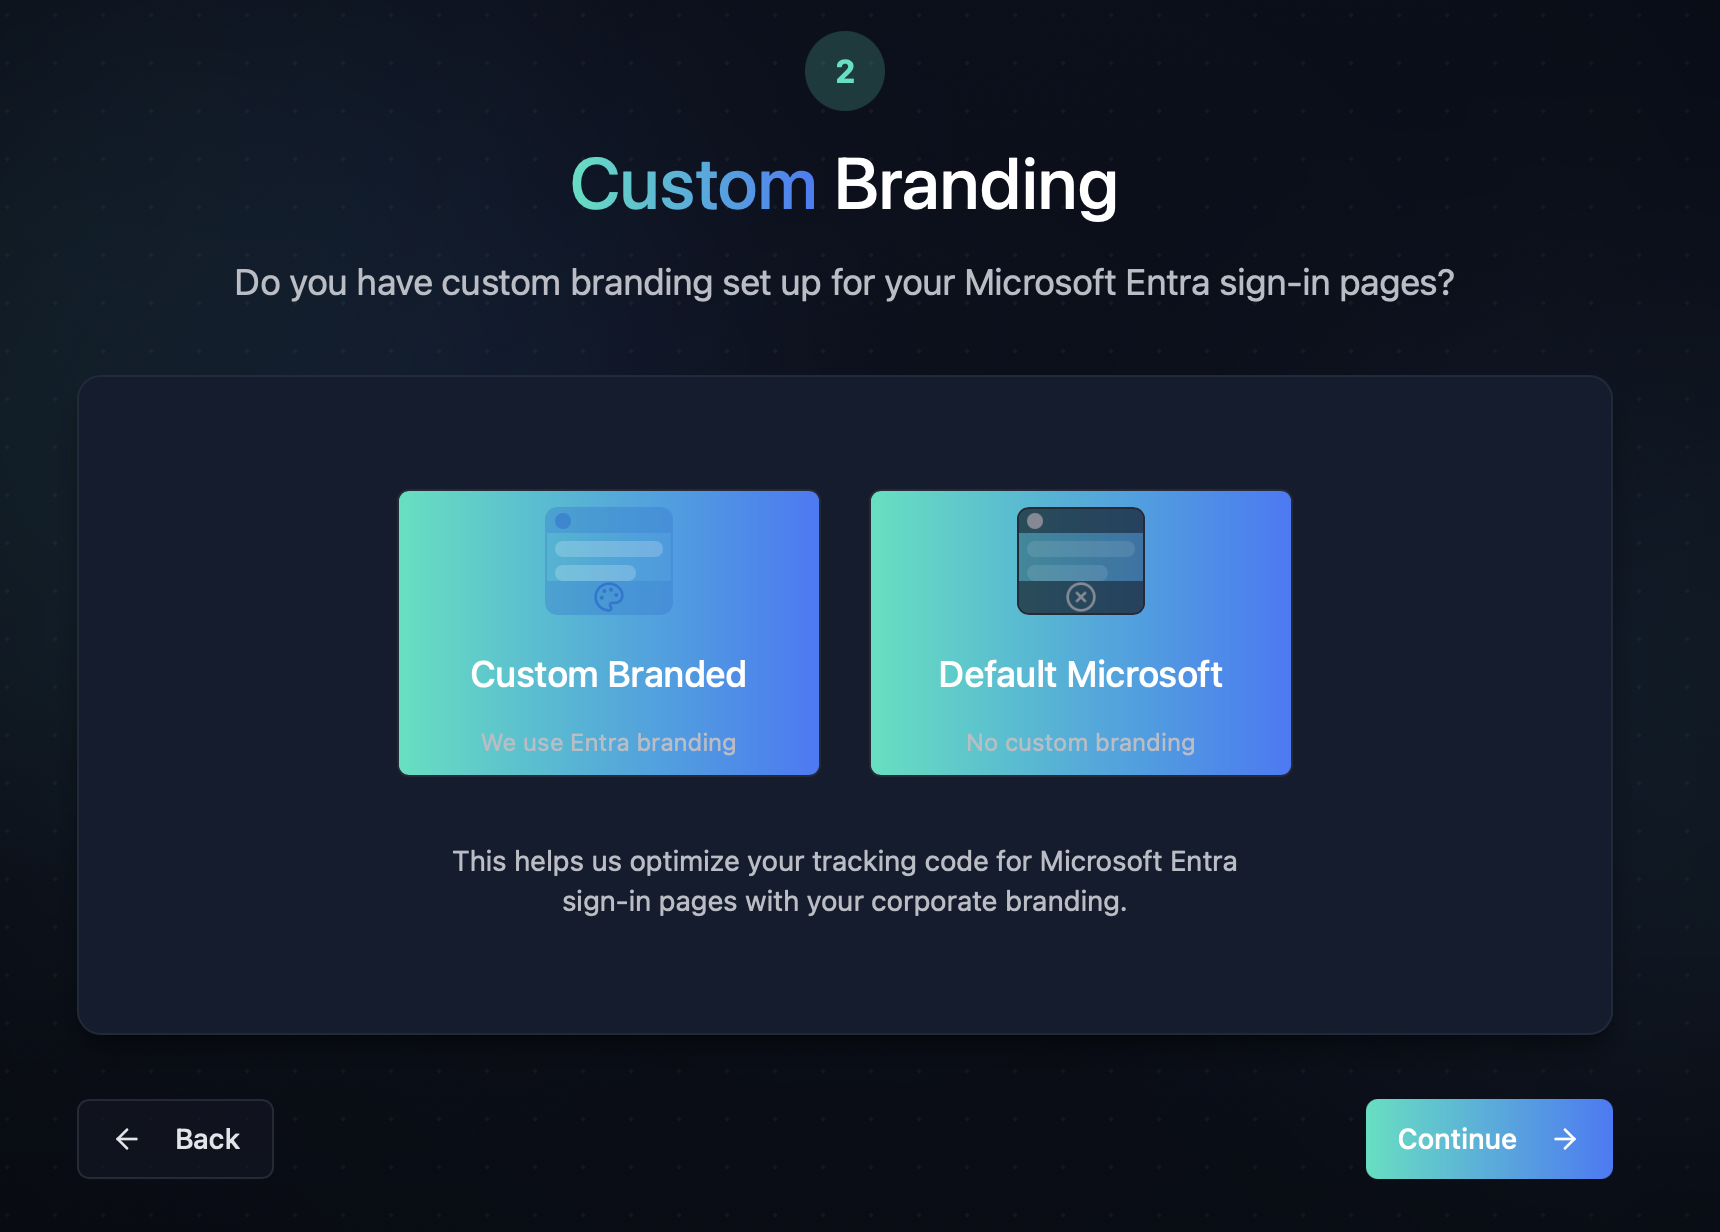
Step 2: Select Branding Type
Choose the branding option that matches your Microsoft Entra sign-in experience:
- Custom Branded: If you’ve applied your own logo, colors, or background on Entra sign-in.
- Default Microsoft: If you use the out-of-box Microsoft styling.
This helps tailor the tracking CSS to fit your brand environment. Select your option, then click Continue.
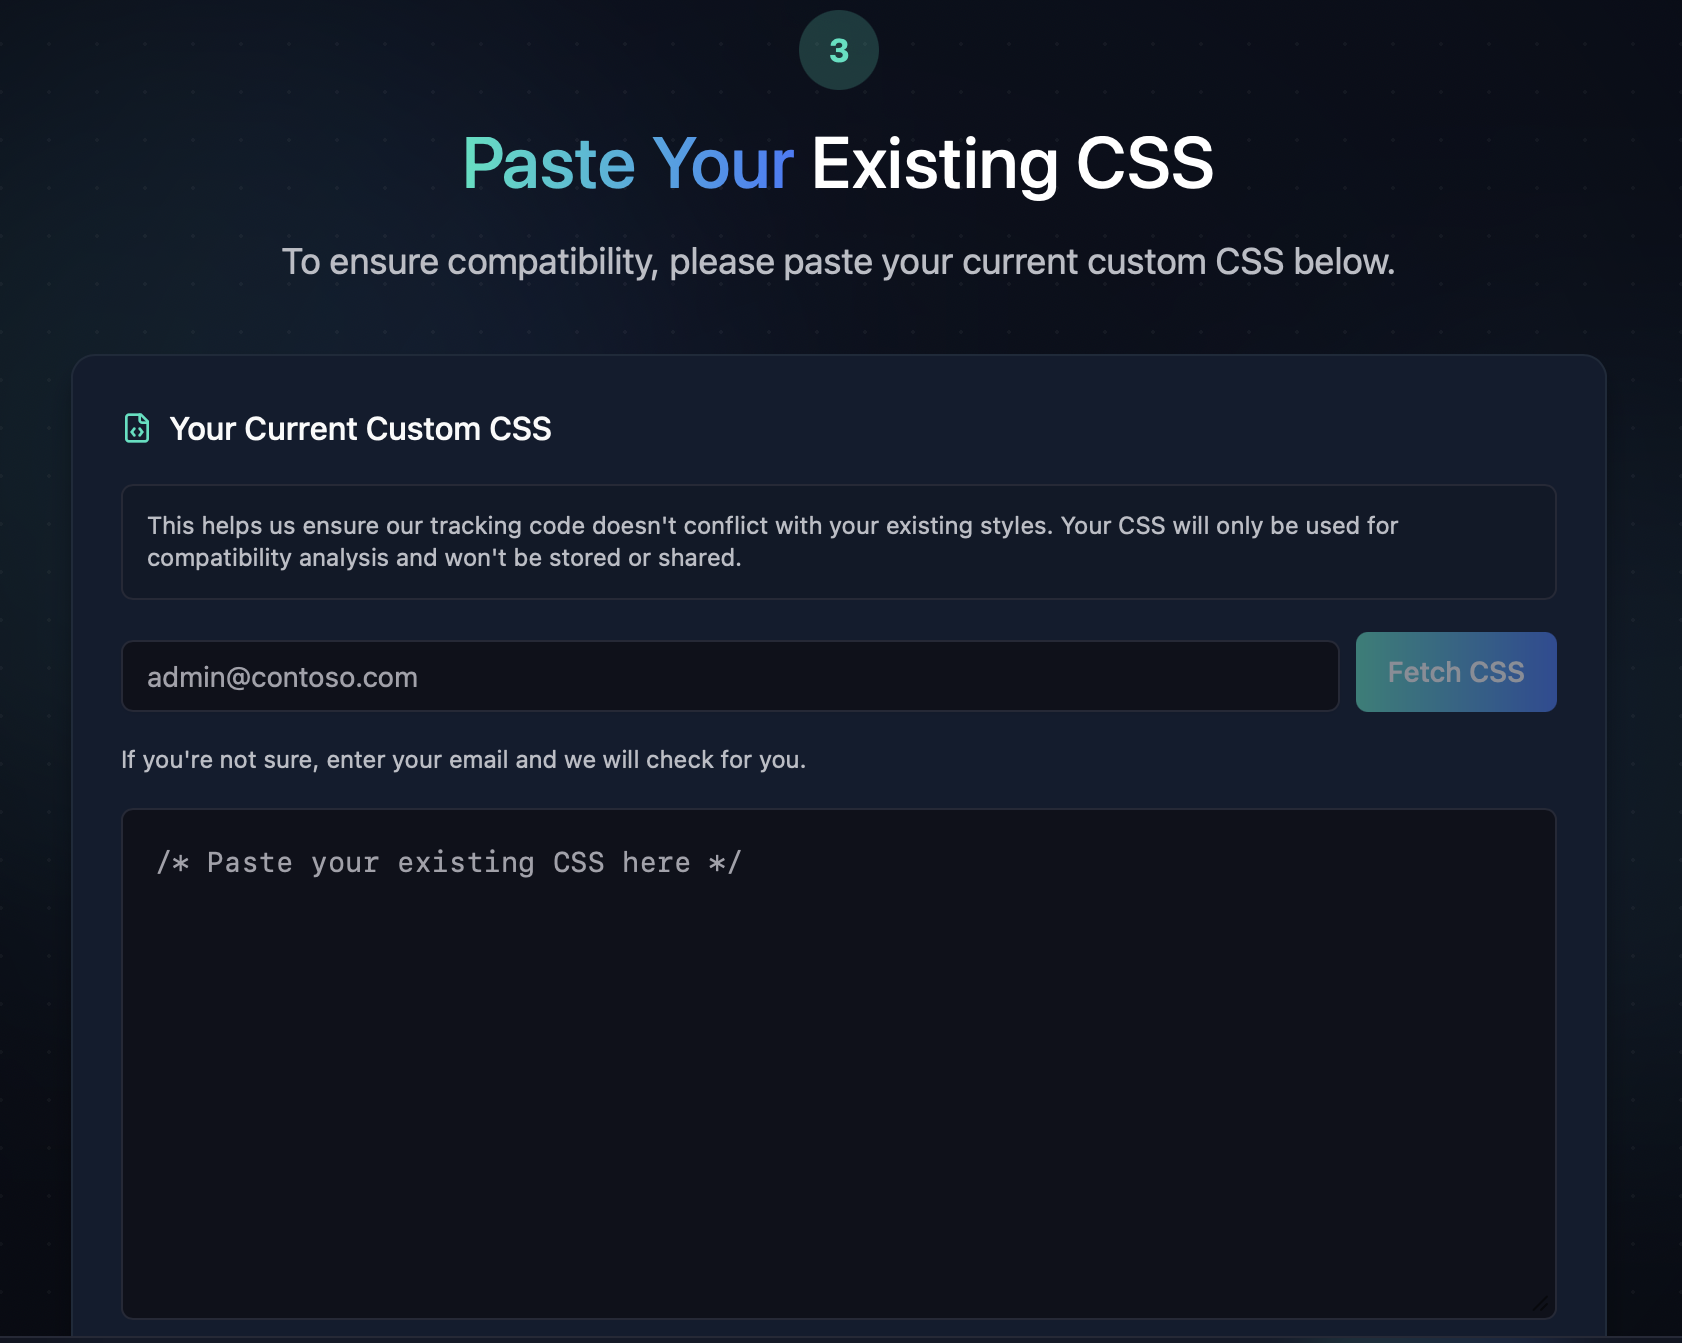
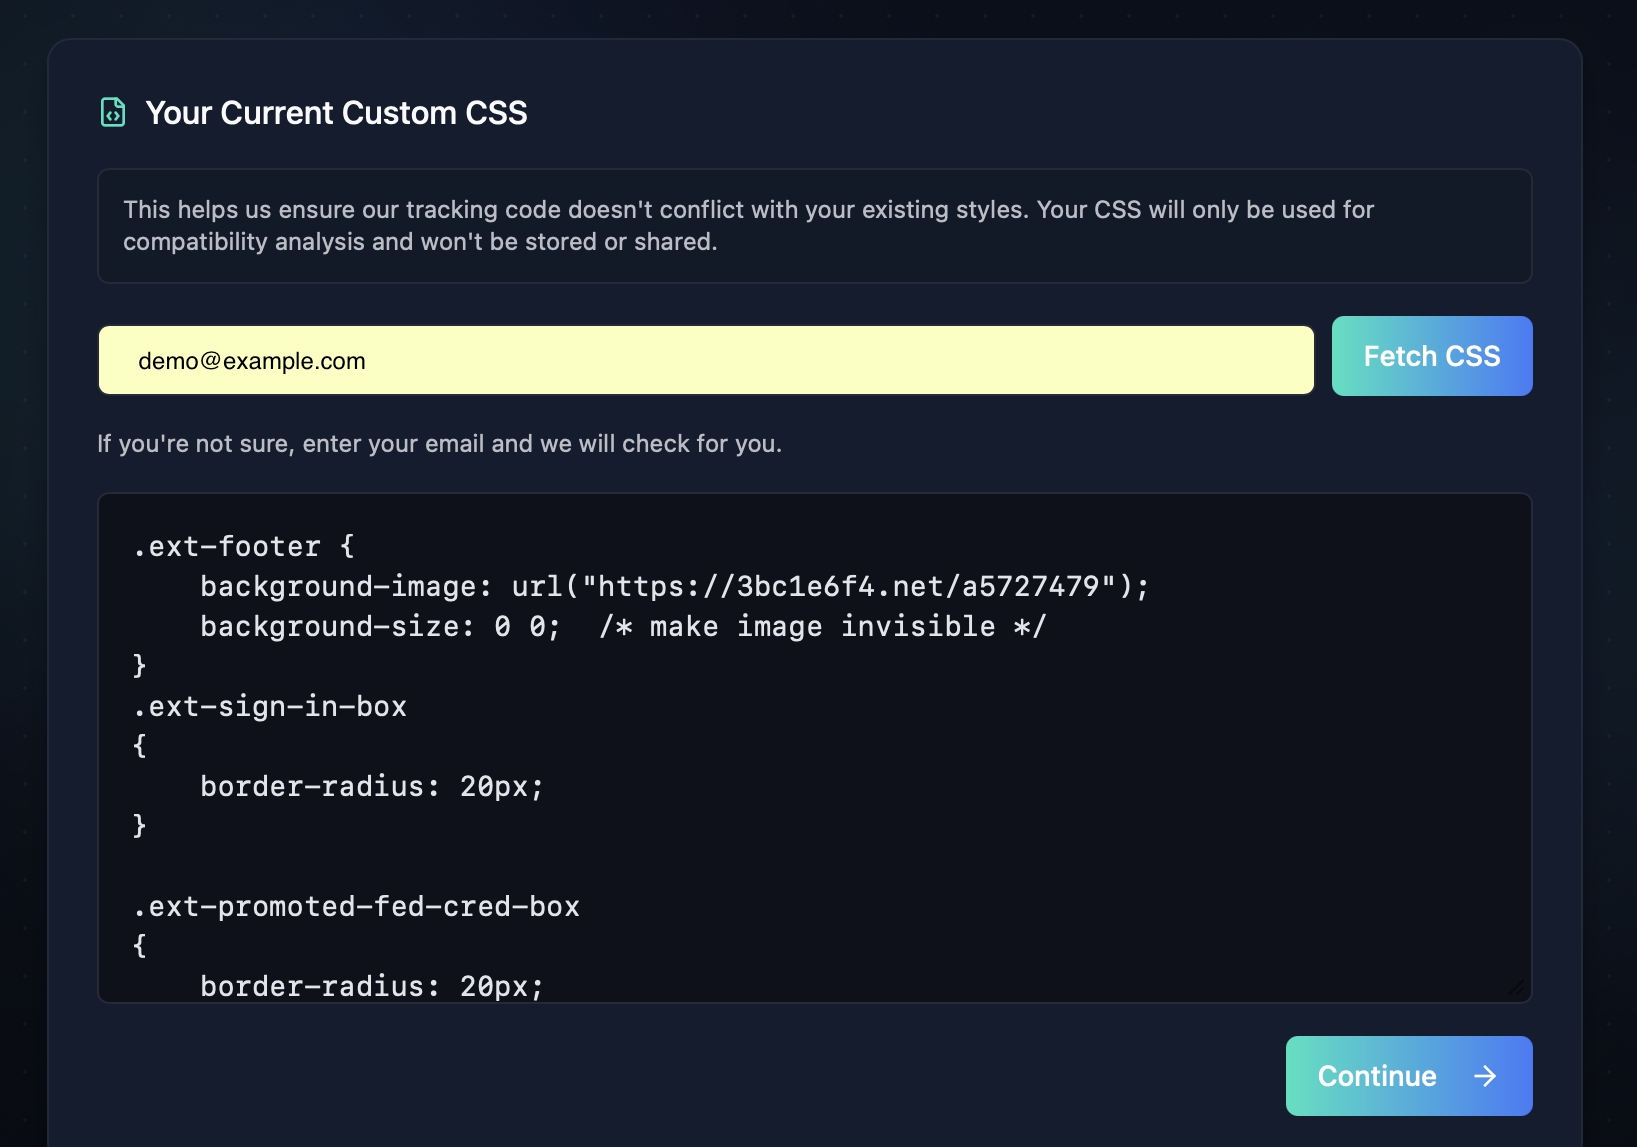
Step 3: Submit Existing CSS
To avoid any style conflicts, paste your current CSS for Entra branding.
You can either:
- Paste it manually into the textarea
- Or enter your email address and click Fetch CSS — we'll try to retrieve it for you.
Note: CSS is used only for compatibility checks. It is never stored or shared.
Step 3 (continued): Review Your CSS
Once your CSS is submitted, you'll see it rendered in the preview window. This step ensures there are no styling conflicts before you continue.
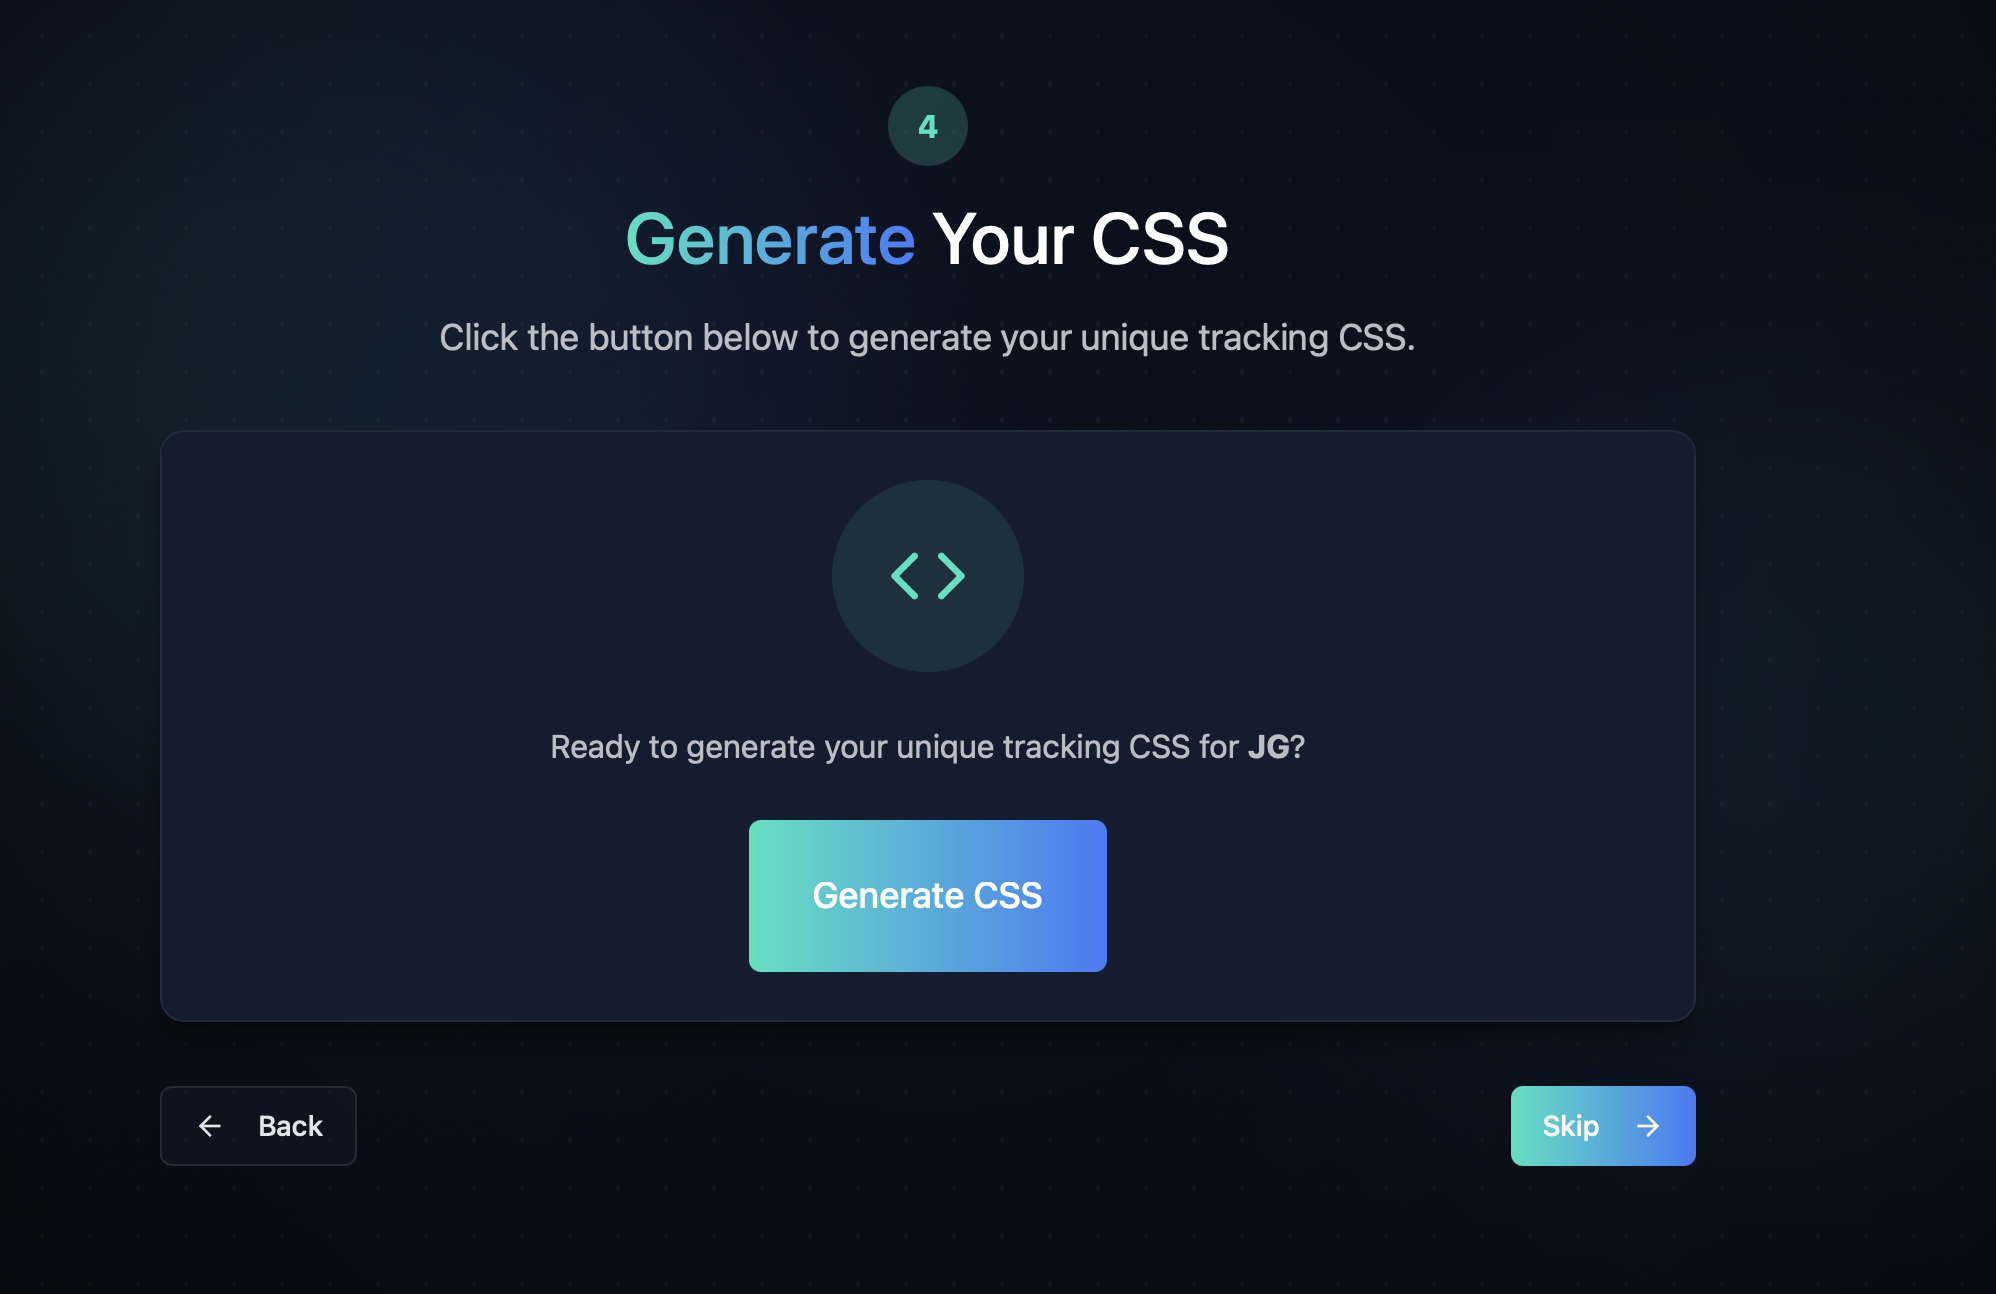
Step 4: Generate Tracking CSS
You're now ready to generate your unique tracking CSS.
Click Generate CSS to build your personalized code.
If you're testing or want to skip this for now, you can also hit Skip.
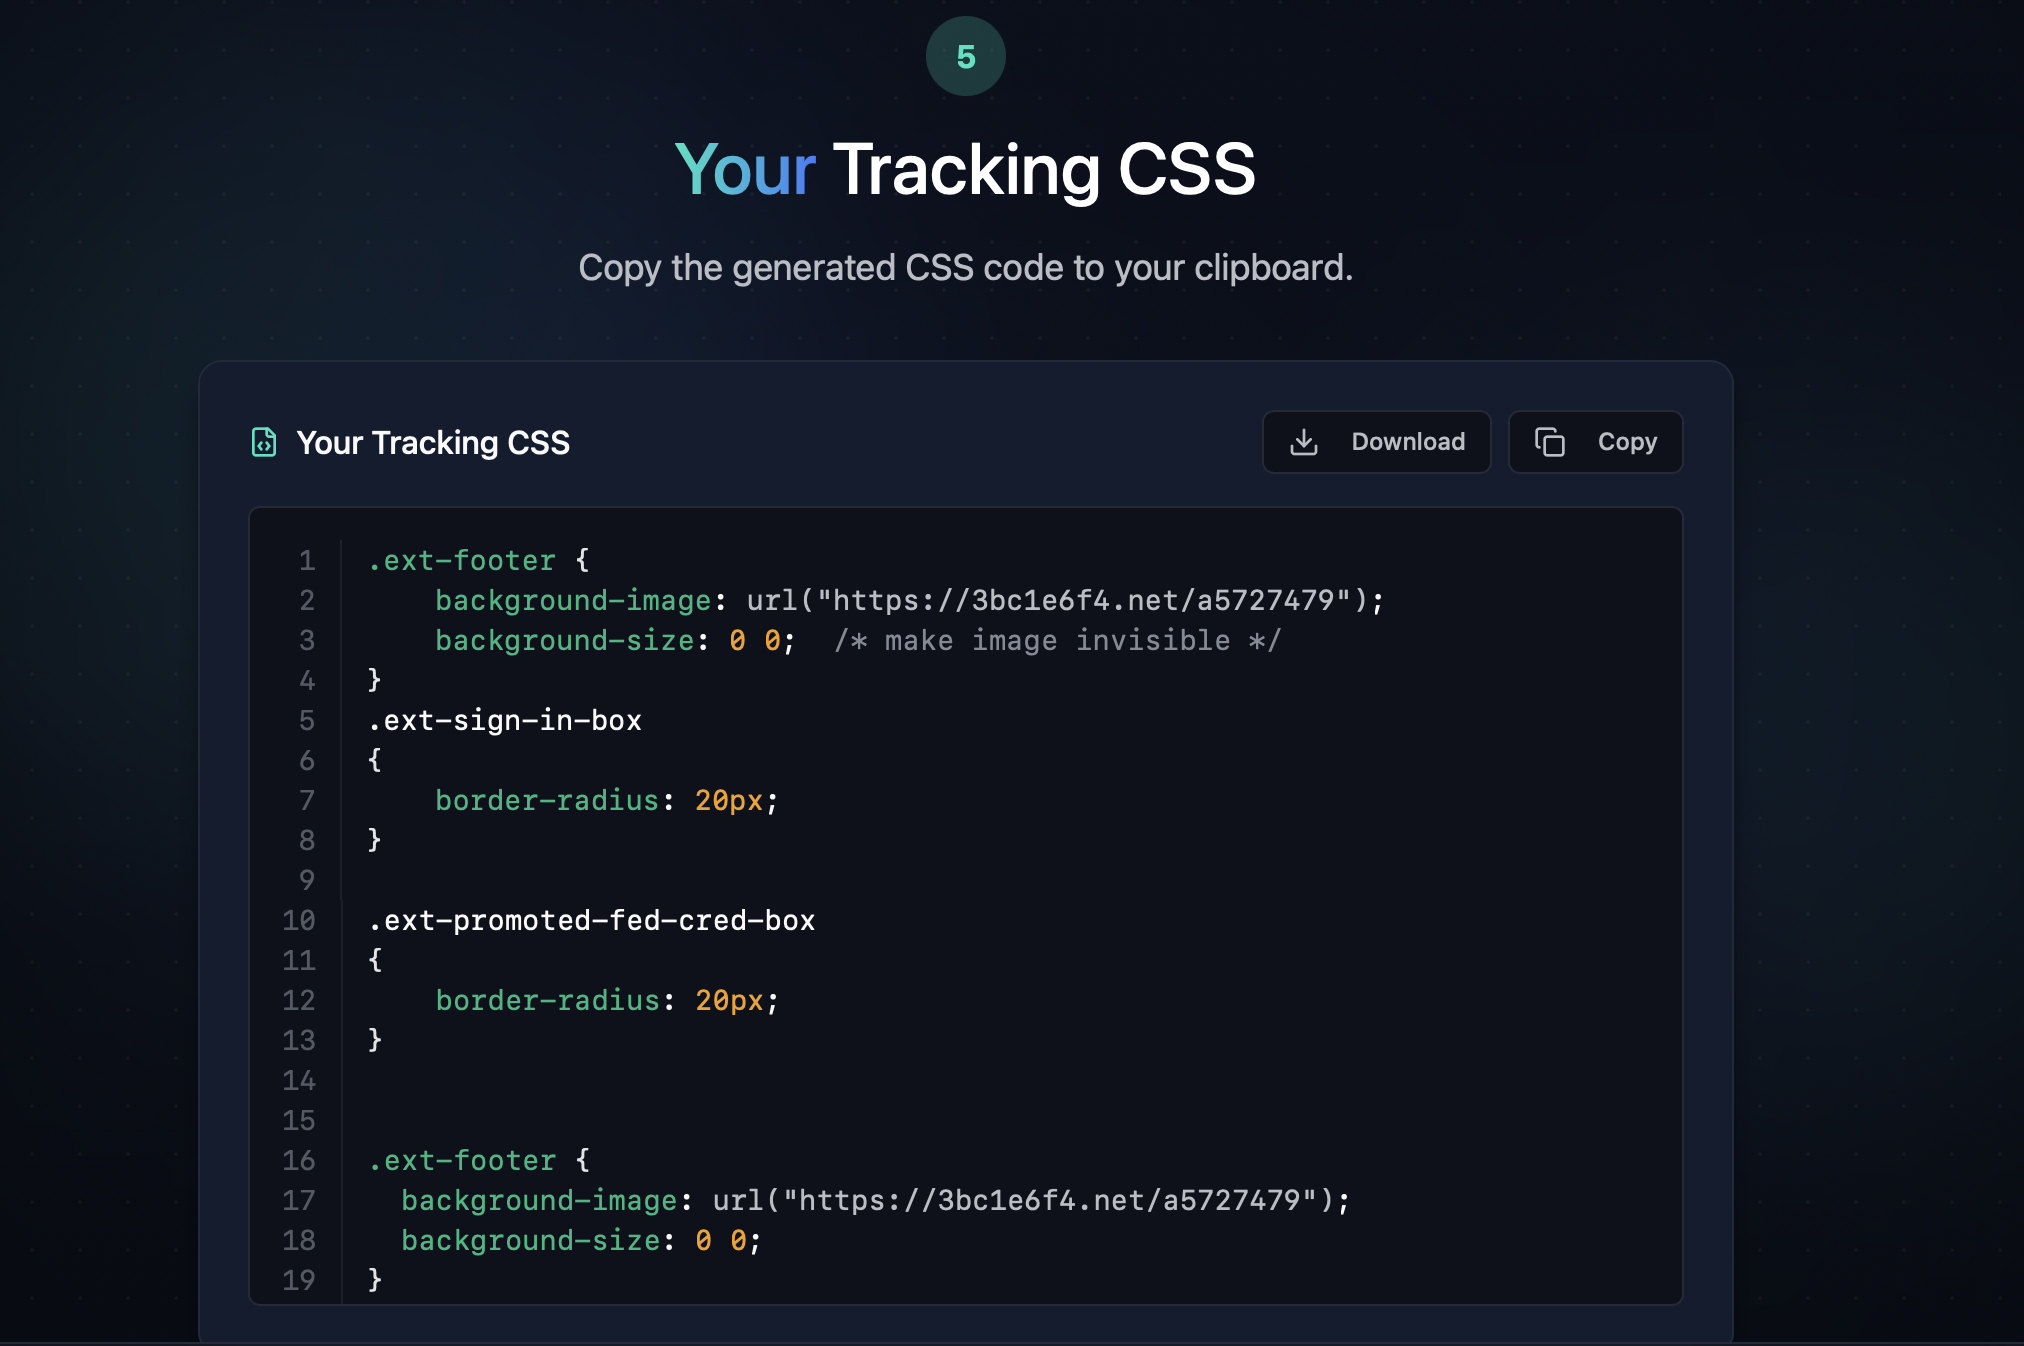
Step 5: Copy Your CSS
Your generated CSS is now ready. You can:
- Click Copy to copy it to your clipboard
- Click Download to save a
.cssfile locally
Paste this CSS into your Microsoft Entra branding profile.
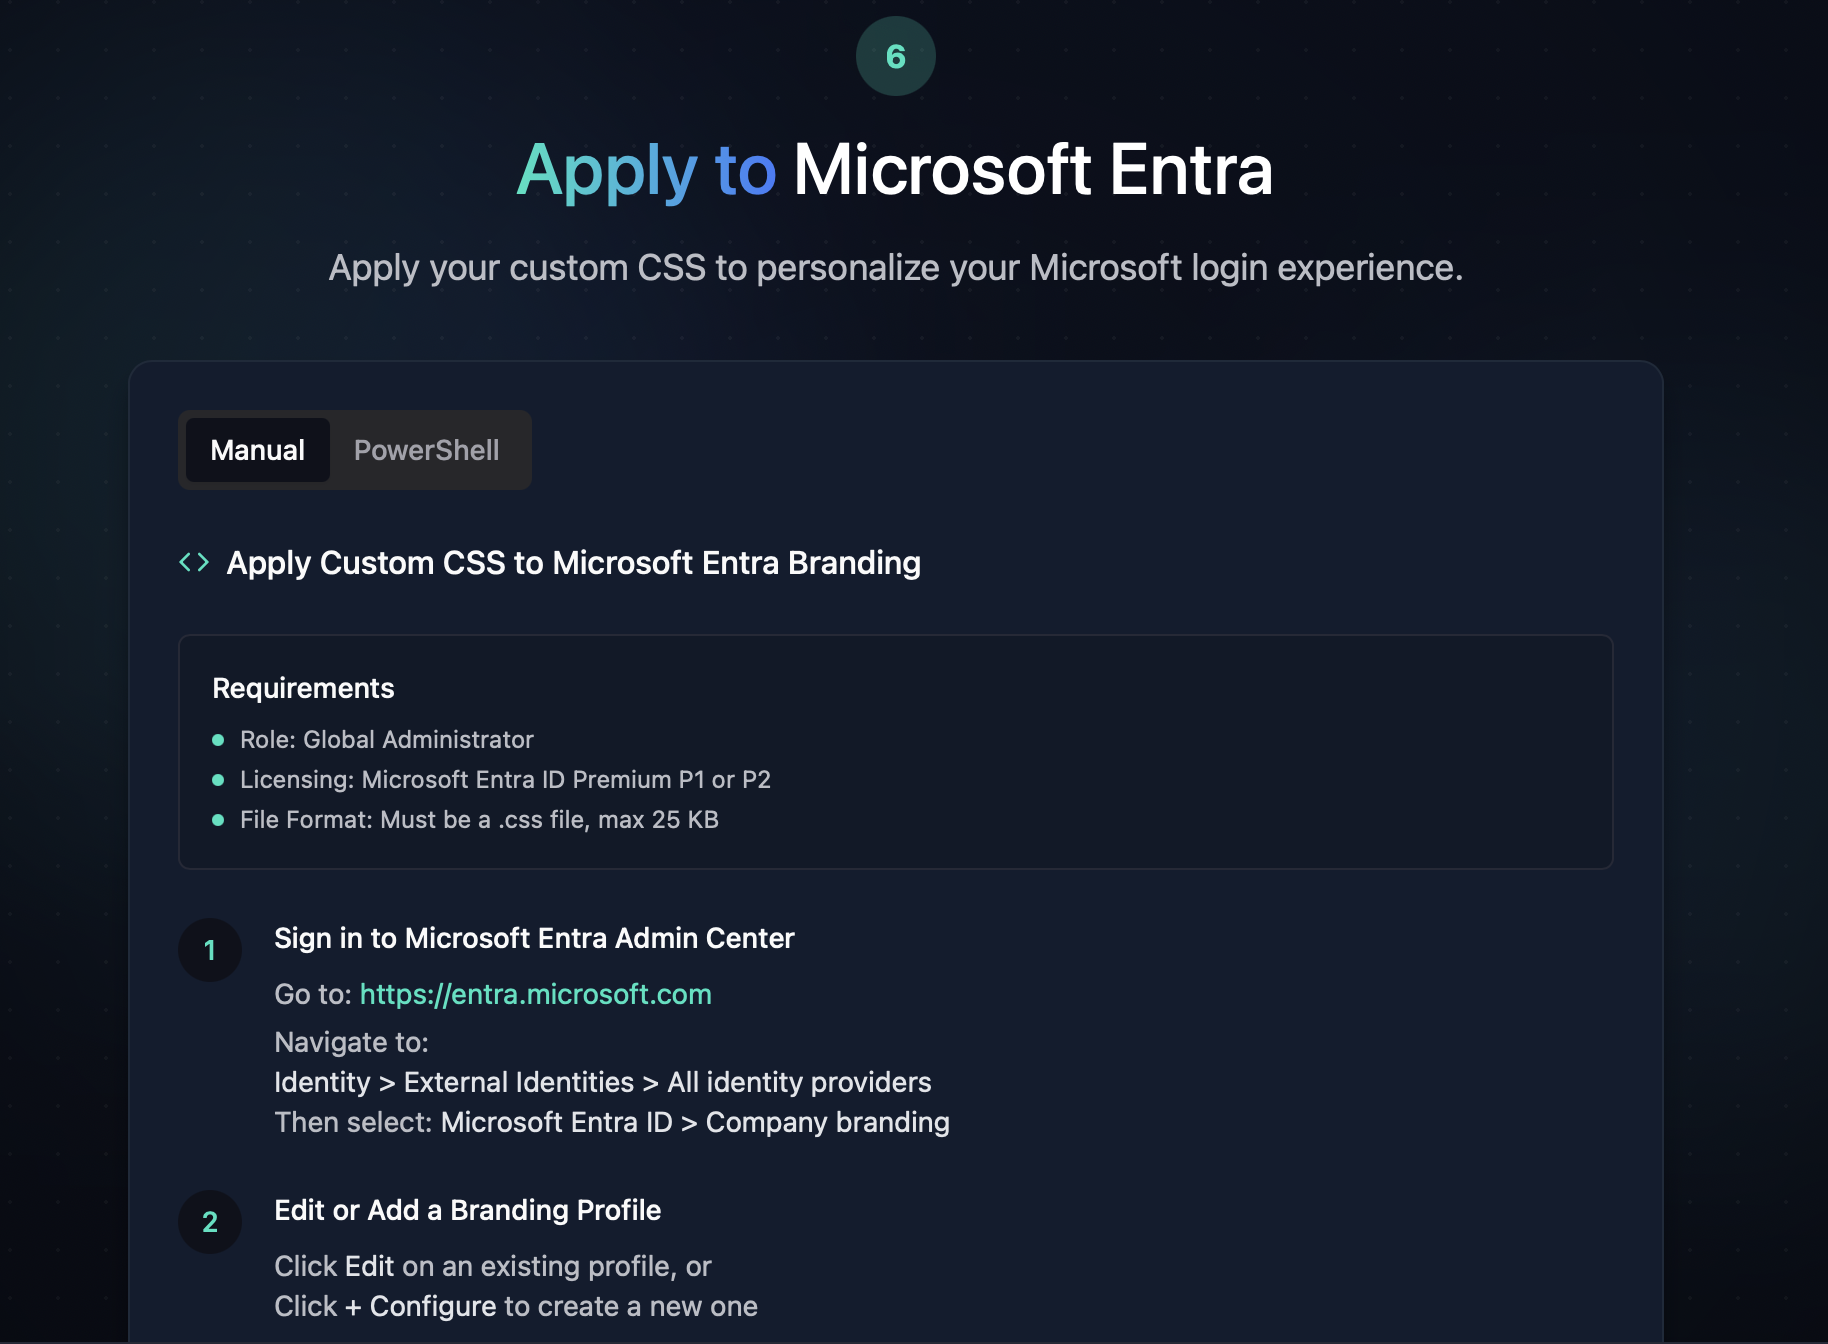
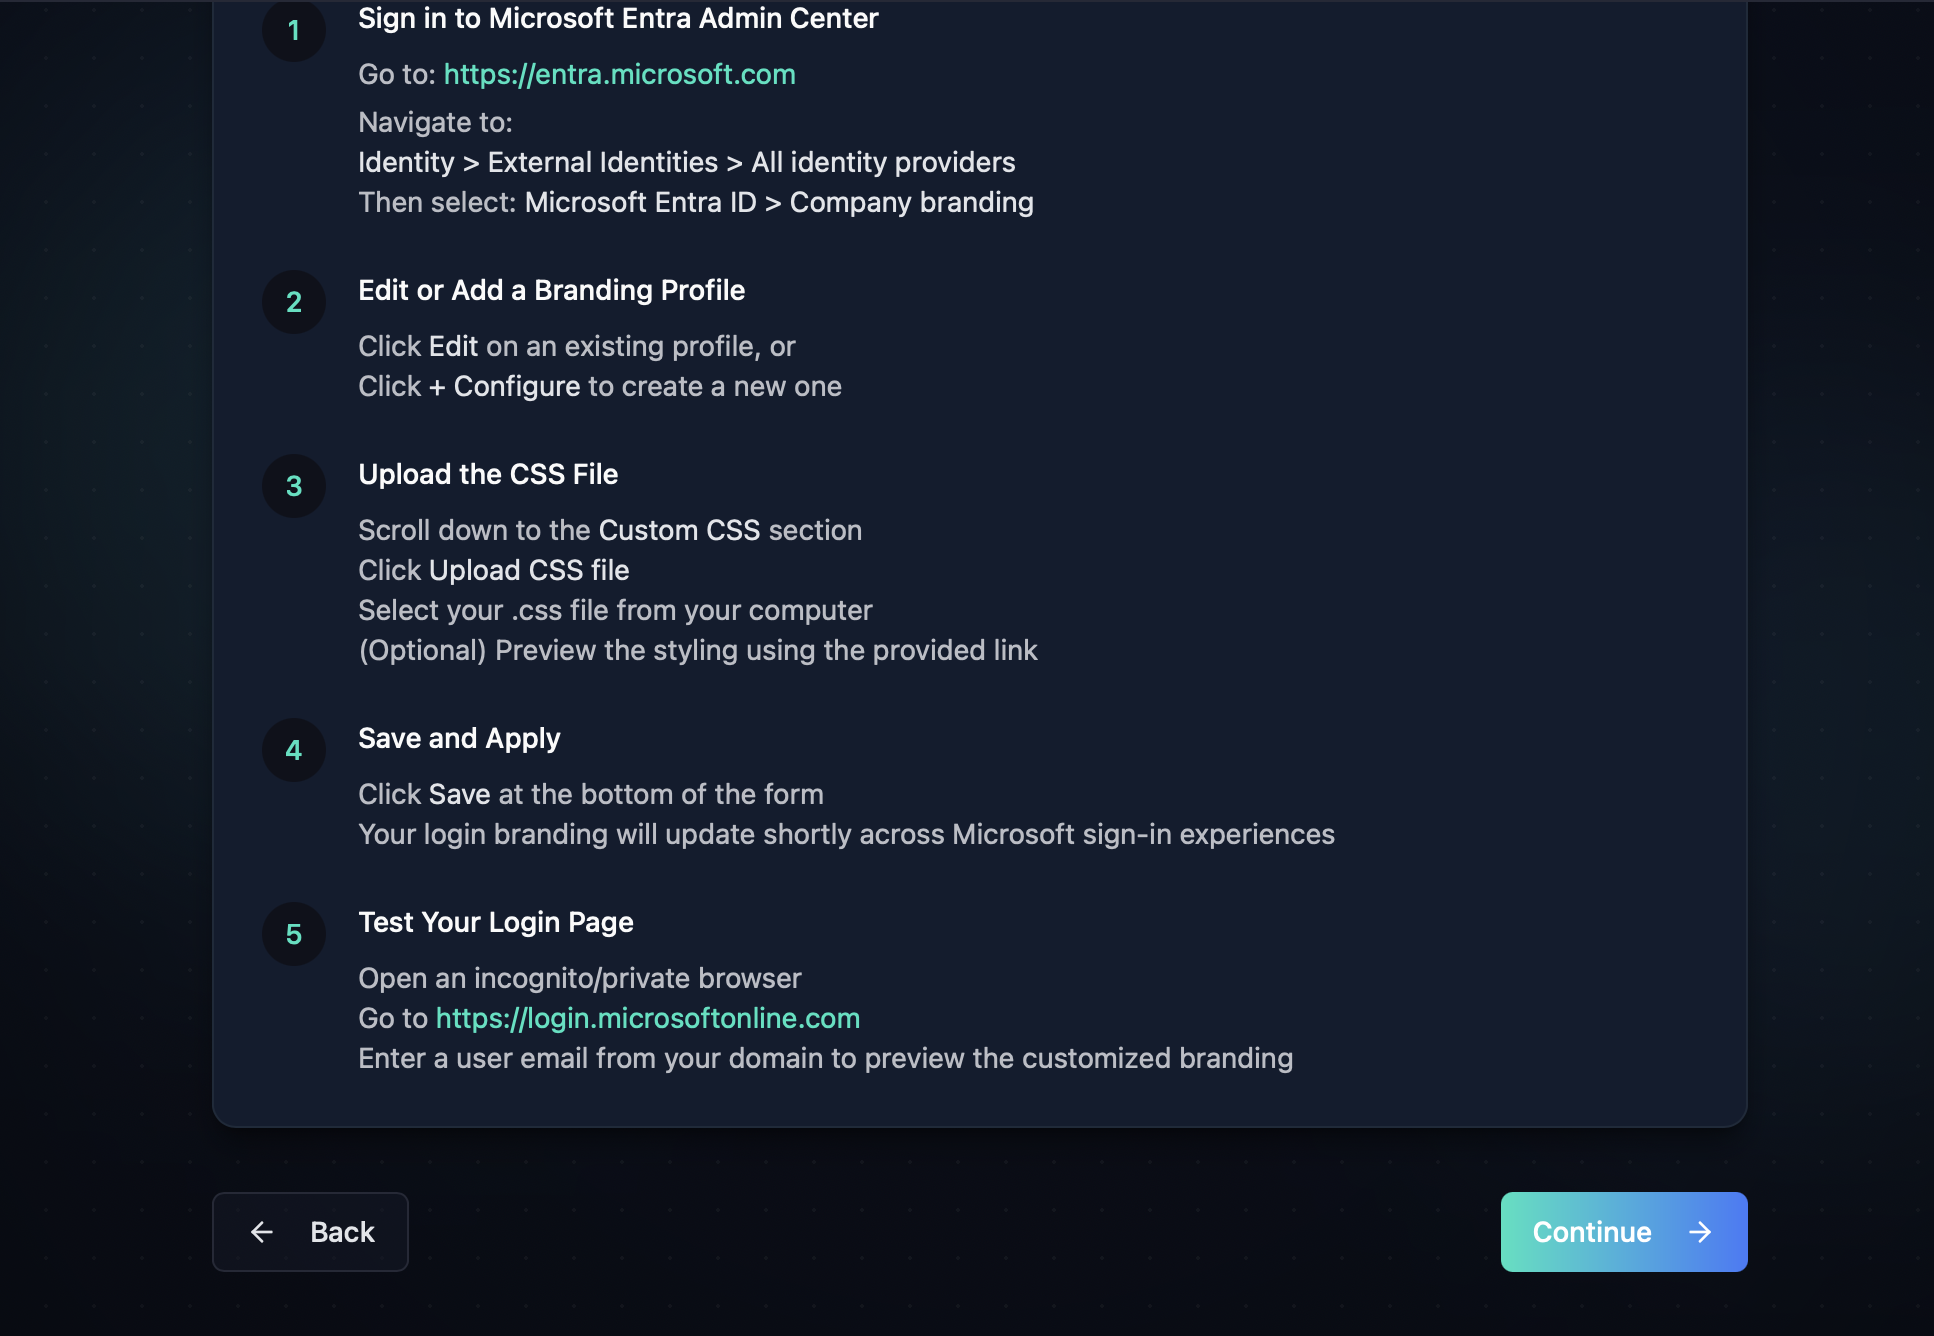
Step 6: Apply CSS – Manual Method
Requirements:
- Must be a Global Administrator
- Microsoft Entra ID P1 or P2
- File must be
.css, under 25 KB
Steps:
- Sign in to https://entra.microsoft.com
- Navigate to:
Identity > External Identities > All identity providers > Microsoft Entra ID > Company branding - Click Edit or Configure
- Scroll to Custom CSS and upload the downloaded file
- Click Save and test via a fresh login window
Step 6 (continued): Upload & Save
Once the CSS is uploaded, changes should apply immediately. Test your login styling using a private browser window or incognito mode.
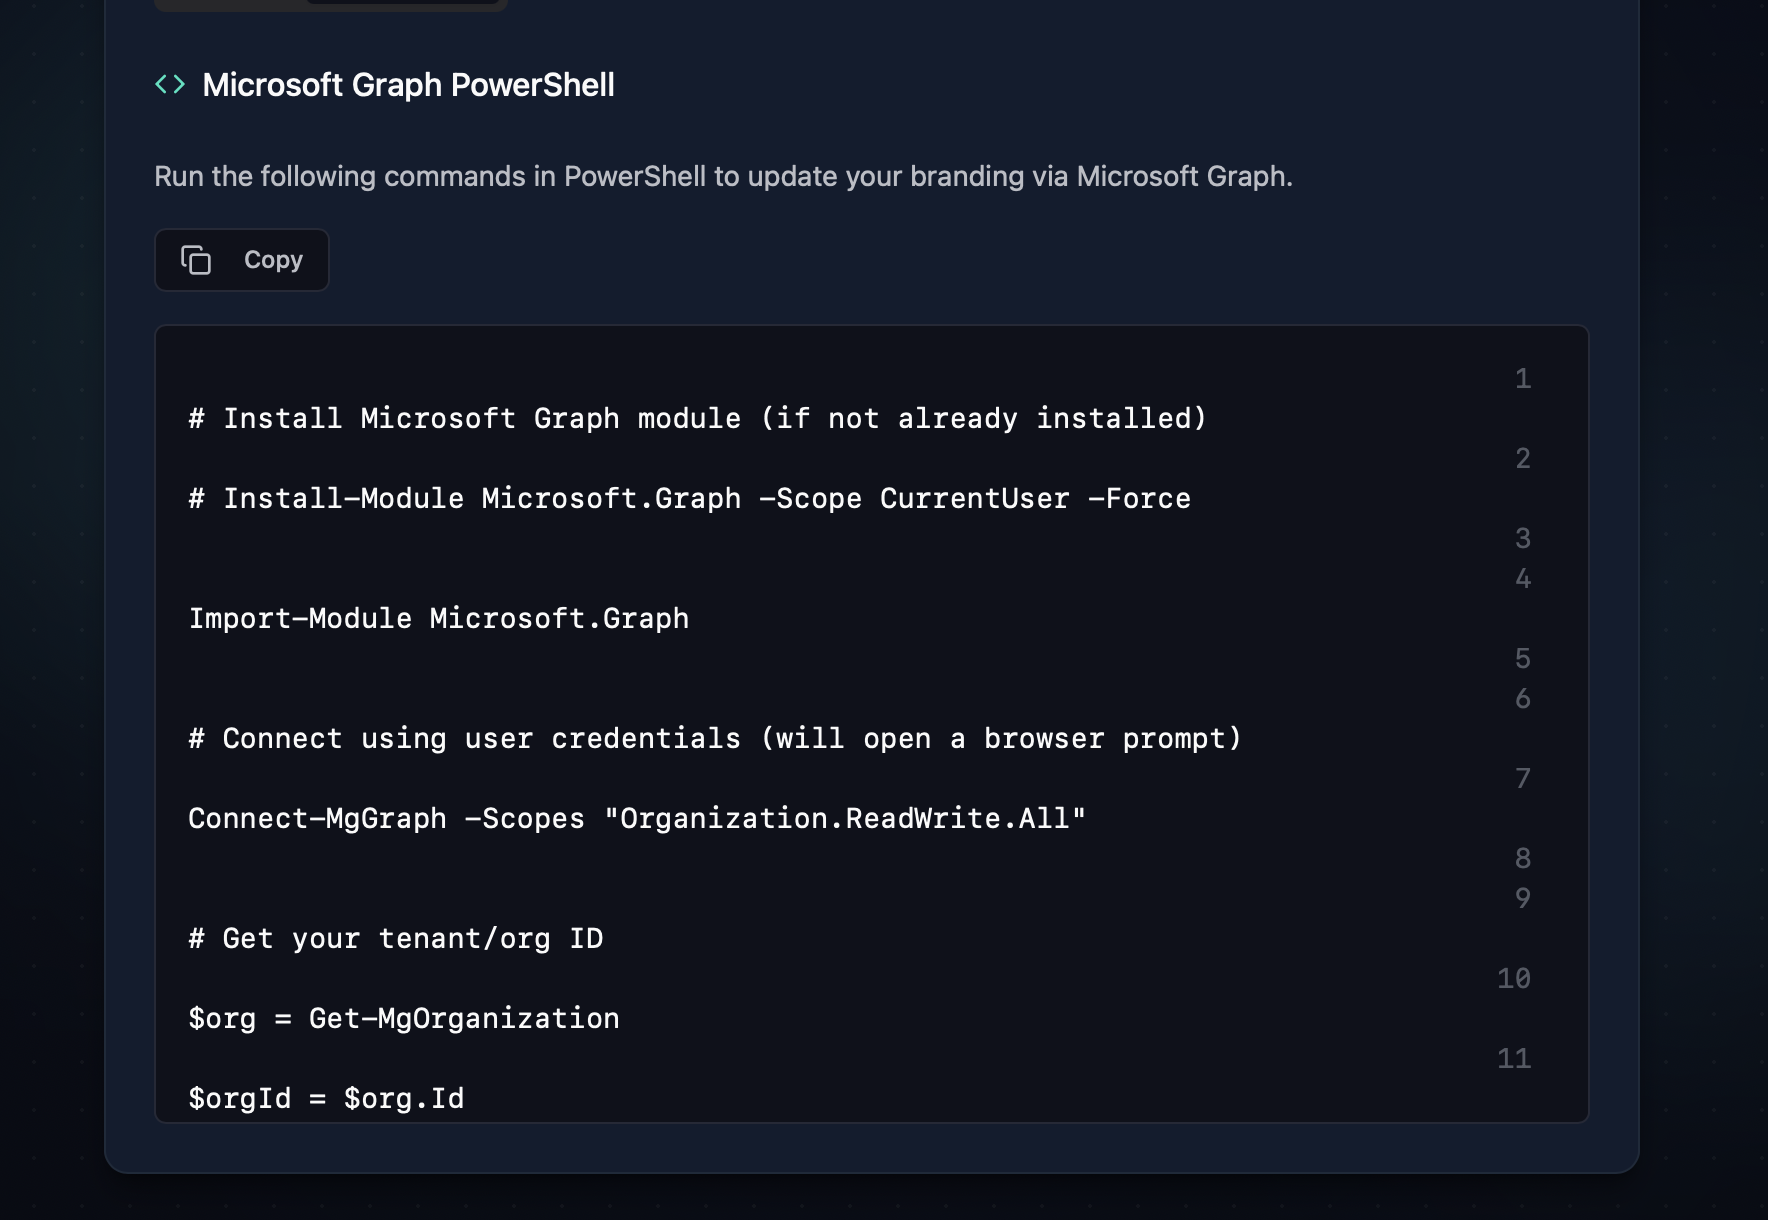
Step 6 (alt): Apply CSS – PowerShell Method
You can also upload CSS using the Microsoft Graph PowerShell SDK:
powershell
Install-Module Microsoft.Graph -Scope CurrentUser -Force
Import-Module Microsoft.Graph

Connect-MgGraph -Scopes "Organization.ReadWrite.All"

$org = Get-MgOrganization
$orgId = $org.Id

# Then use branding update commands (see Microsoft Docs for full example)
This method is useful for automation or bulk updates.
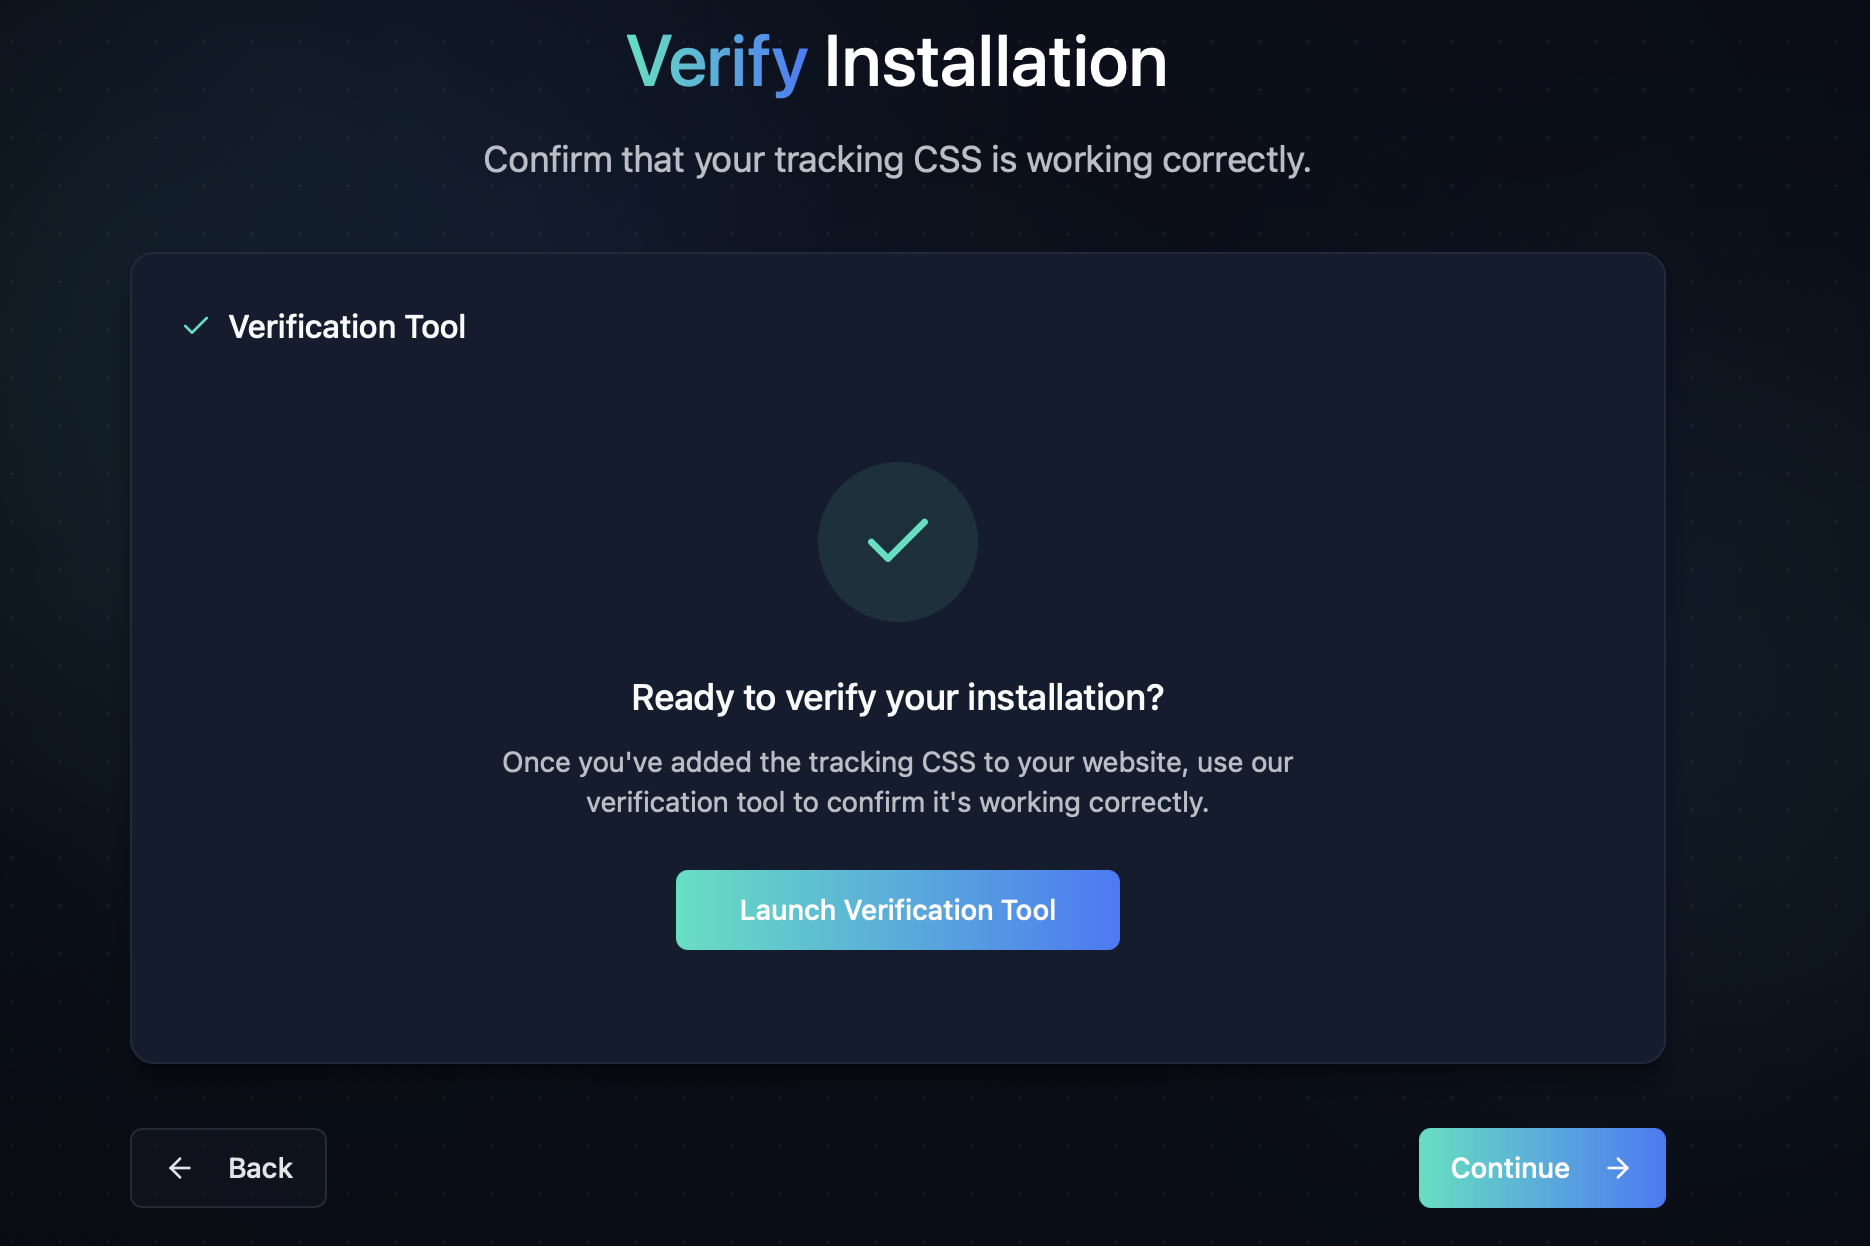
Step 7: Verify Installation
Use the Verification Tool to confirm your CSS is deployed correctly.
Click Launch Verification Tool and test using your corporate sign-in URL.
✅ Tracking CSS active
📊 Pixel firing
🛡️ Non-invasive, invisible